Sunday, March 27, 2011

It's a Farm full of File Folder Activities!


FILE FOLDER GAME FUN!

Offering file folder games for preschool classrooms are so much fun and offer concept learning in a way that offer gradual learning by one child or with a small group of children.
They are so to make and even more enjoyable for your children as they bring into the classroom a change in routine for interest areas. The folders help bring a sense of independence to the children and offer a different way of learning a variety of concepts that may be challenging for some to grasp


Six easy steps in creating a simple File Folder Game:

Step 1.
Print the main part of the game (aka- the activity sheet), on regular printer paper. This is the part that will be glued to your file folder. I would recommend either coloring the picture or printing it out in color. If you have a file folder book, pick a game you want to make and copy the part that is to be glued to the file folder onto regular printer paper and then color it.

Step 2.
Print or copy the game pieces onto cardstock. Color these pieces as needed.

Step 3.
Laminate the game pieces either with a laminator or contact paper.

Step 4.
Glue the activity sheet to file folder, label the file folder and then laminate. If you plan to us contact paper,  cut out a piece big enough for each half of the inside of the file folder. In other words, don't try to laminate the inside using one piece of contact paper, cut it in half. You can choose to only use contact paper on the inside of file folder or on the outside also. It may be easier just to laminate the one side of the file folder.

Step 5.
Put the game pieces in a Ziplock sandwich bag and tape to the file folder. I would recommend using packing tape so it secures for longer use.

Step 6.
It’s always important to introduce the file folder activity to children during your morning meeting or circle time. Actually participate in the activity so they understand how it is used. Then share with them what interest area the file folder will be placed. For the next few days, spend more time in that particular interest area so you can help children learn how to use the game. This is very important!!!


Below are several File Folder games appropriate
 for 4K classroom settings!


Patterns/Matching

Heart Pattern Match-Up


Down on The Farm


How to Play the Game:This is an animal matching game that you
can play in a variety of ways.  The first way
is to simply print two sets of each page
and have the children match the pictures of
the animals.  The second way is to print
one set of the animals, cut them out and
then cut them each in half vertically. Glue
the front half to the file folder, and keep the
back half for the playing pieces to match.


Dog Matching Game:

http://jcps.jefferson.k12.ky.us/AngelUploads/Files/garmstr1/MISC/dog%20matching.pdf


Opposites

Open the Opposites!


Sequencing


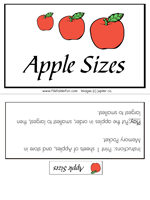
Apple Size Sequencing Game:


http://www.filefolderfun.com/files/FileFolderGames/Apples/AppleSequencingTP.pdf
http://www.filefolderfun.com/files/FileFolderGames/Apples/AppleSequencing.pdf


How to Play the Game:This is a size sequencing game where
children can place the apples in order from
smallest to largest, then largest to
smallest.


Starfish Size-Up:


http://www.filefolderfun.com/files/FileFolderGames/Ocean/StarfishTP.pdf
http://www.filefolderfun.com/files/FileFolderGames/Ocean/StarfishSize.pdf
http://www.filefolderfun.com/files/FileFolderGames/Ocean/StarfishSize2.pdf
http://www.filefolderfun.com/files/FileFolderGames/Ocean/StarfishSize3.pdf

How to Play the Game:This is a size sequencing game for
children who are learning to classify and
sort the starfish by size.


Dino Size It:

http://www.filefolderfun.com/files/FileFolderGames/Dinosaurs/DinoSizesTP.pdf
http://www.filefolderfun.com/files/FileFolderGames/Dinosaurs/DinoSizes.pdf
http://www.filefolderfun.com/files/FileFolderGames/Dinosaurs/DinoSizes2.pdf
http://www.filefolderfun.com/files/FileFolderGames/Dinosaurs/DinoSizesBW.pdf
http://www.filefolderfun.com/files/FileFolderGames/Dinosaurs/DinoSizes2BW.pdf

How to Play the Game:This is a set of printable dinosaur sequencing
cards for children to order in smallest to

largest, and largest to smallest.


Rhyming


http://www.enchantedlearning.com/filefoldergames/rhymes/page2color.shtml

"This is a rhyme game. For each word, find the word that rhymes with it. To check your answers, look at the answer key on the back of the folder. See how many rhymes you can find!"

Using small yarn pieces, let children match the correct rhyming words with the yarn.

Copyright 1998-2010 http://www.enchantedlearning.com/


 File Folder Activity Websites


 It's so easy to come up with your own sequencing file folder games. Take a look at your lesson plan for the week and pull words being used on a daily basis within your weekly theme to create a rhyming file folder activity!




Sunday, March 20, 2011

On A Spring Time Hunt with My Five Senses


On A Spring Time Hunt with My Five Senses.

Helping preschoolers understand the concept of different seasons, especially Spring, can be easily accomplished when using our five senses.


The weather feels wonderful, nature is calling with it's variety of animal sounds and the Earth is blooming with a fun sights, smells and sweet tastes! 
Nature offers multiple opportunities for those ranging from sensory to linguistic learning styles to gain knowledge about Spring. The activities below are designed for children to use their five senses in an enjoyable and fun way!


Springtime Outdoor Fun

Introduce the concept of spring with your preschoolers by helping them utilize their five senses.
SEEING – Spend a day outside, observing spring. Look for things such as:
 Buds opening
 Birds returning                                                                                                   
 Spring flowers, such as; tulips and daffodils
 Rainbows and rain clouds
 Trees bending or kites flying
4K Extension: Always provide children with writing materials before heading outside so they are able to write, draw and express what they are seeing while on their Springtime journey!- Kelli Boniecki

HEARING – Have your children listen for the sounds of spring.
 Birds singing
 Wind blowing   
 Rain hitting sidewalks or the roof
4K Extension: Create a CD or locate a music/sound CD that offers multiple sounds one may hear outdoors.
After their outdoor hearing experience, have children come in and listen to each sound. Let them try and figure out what the sound is they are hearing. Provide multiple sounds for children. Some examples may include: train, bumble bee, cricket, bird, squirrels playing, lawnmower, beach, kids playing, fan running, trees swaying with the wind, thunderstorms, etc.
If the children are puzzled by one of more of the sounds, write them down on a chart and let them go back outside and listen for the sound or have it be an at home project to enjoy with their family.- Kelli Boniecki

 
FEELING What can they feel when they go outside this time of year
 Rain falling
 Breezes blowing
 Soft new grass
4K Extension: Feeling Discovery boxes are perfect ways to add sensory games to this activity. Take an old cloth bag, feelings box or shoe box and place items in the box that pertain to the Spring season and what we would find outside this time of the year. Have the child turn away from the box, place their hand in the box and try to guess what the item is he/she is feeling. Suggestions for items: leaf, moss, grass, pine cone, seeds, soil (pour some in a zip lock bag and have them feel the outside of bag), sand shovel, ball, suntan lotion (pour some in a zip lock bag and have them feel the outside of bag), rocks, etc.

If the children are puzzled by one of more of the mystery items, write down their description of the item on a chart. At the end of the activity, have them work together in trying to figure out what the mystery items really were during the activity!- Kelli Boniecki

 
TASTING - This one is a little harder but they may be able to come up with some tastes.
 Easter eggs and candy
 Green eggs and ham
4K Extension: Enjoying the fruits of their labor is such a fun experience for children. How about letting children taste their fruits and vegetables is a garden has been grown and ample time has been given for the seeds to mature into a produce item. Allowing children to create their own salads whether it be a fruit or vegetable one is so much fun and rewarding!
If a garden was not planted this year, picking up a few different fruit and vegetable items from the local Produce Market will prove to be enjoyable as children can make taste testing samples of the items purchased. They can sort by colors, textures, and taste!- Kelli Boniecki

SMELLING – This one is also a little hard, I hope you did better than I did.
 Smell of fresh grass after a rain.
 Smell of manure or fresh plowed fields.


Themed Activities

BIRDS  


BIRDSEED FUN
 Identifying Colors: Place birdseed in small bowls for your children to examine with magnifying glasses. How many different colors can they see?
 Making Counters: Use a squeeze bottle of glue to draw individual numerals on 4-by-5-inch squares of construction paper. While the glue is still wet, help your children sprinkle the numerals with birdseed and tap off the excess.
 Pouring and Measuring: Place some birdseed in a large tub. Give your children a set of plastic measuring cups to use for pouring and measuring experiments. 


BIRD NEST MATERIALS
In spring, birds search for items to use in building their nests, such as short pieces of yarn and string, dried grasses, and balls of hair shed by pets. Let your children help the birds make their nests with these activities.  Place items such as those above in a mesh vegetable bag and pull the ends of the materials out through the holes. Hang the bag on a branch outdoors for the birds to discover. 
 Lightly weave short pieces of yarn or string around the outsides of pine cones. Twist chenille-stem loops onto the pine cones and hang them on outdoor branches.


CARDBOARD TUBE BIRD FEEDERS
For each of your children, stand a short cardboard tube upright. Punch two holes in the tube across from each other near the top. Help the children cover their tubes with creamy peanut butter and roll the tubes in birdseed. Then thread a chenille stem through the holes in each tube to make a loop for hanging on a tree branch.

(C) Jean Warren http://www.preschoolexpress.com/


GARDEN


VEGGIE GARDEN GAME
From felt, cut out five or more each of different veggie shapes, such as carrots, radishes, squash, and cucumbers. Mix up the shapes and place them in a pile. Let your children take turns sorting the veggie shapes by kind and “planting” them in separate rows on a flannel board or a carpet.
 
PLANTING GARDENS
Let your children try one or more of the gardening ideas below. Encourage them to care for their gardens by watering and weeding. Some suggested seeds: marigolds, beans, peas, and radishes. (Check a local nursery for other easy-to-grow seeds for your area.)
 Eggshell Garden: Plant seeds in eggshell halves placed in an egg carton. When the seeds sprout, plant them—crushed shells and all—outdoors.
 Windowsill Gardens: Plant seeds or seedlings in small containers. Group the containers together in decorated shoe boxes and line up the boxes on a sunny windowsill.
 Container Gardens: Plant seeds or seedlings in containers outdoors. Use one container for flowers and one for veggies.


PLANT THE GARDEN- Song
Tune: “Frere Jacques”
Plant the garden, plant the garden.                                                                                   
Watch it grow, watch it grow.
Count the pretty flowers,                               
Count the pretty flowers
In a row, in a row.

Plant the garden, plant the garden.
Watch it grow, watch it grow.
Count the yummy veggies,
Count the yummy veggies
In a row, in a row. Heather McPhail
Extension Tip: Before singing, arrange felt flower and veggie shapes in rows on a flannel board. Count the shapes at the end of each verse.
  
GARDEN SNACKS  Let your children enjoy the fruits of their labor by helping put together a garden fresh salad using such foods as lettuce, tomatoes, celery, radishes, and cucumbers. Serve with a favorite dressing.
 Help the children make an herb garden by planting herb seedlings, such as sweet basil, marjoram, and chives, in an indoor container. Let them add the fresh herbs to salads, spaghetti, and homemade pizzas.


FLOWERS


FLOWER PATTERN HEADBANDS
From construction paper, make paper strips to fit around your children's heads. Set out a variety of flower-shaped rubber stamps plus stamp pads in assorted colors. Invite your children to decorate their headbands with color patterns (red rose-blue rose-red rose-blue rose) or shape patterns (tulip-daisy-tulip-daisy). Tape the finished headbands in place when the children have finished.

(C) Jean Warren http://www.preschoolexpress.com/


COLOR CHANGING FLOWERS


Wind


LITTLE WINDSOCKS

Let your children decorate small cardboard tubes by gluing on torn pieces of colorful magazine pictures. Help them glue several long pieces of ribbon or thin strips of crepe paper to one end of their tubes. At the other end, make a hanger by tying on string or yarn. Have the children hang their windsocks outdoors to see which way the wind is blowing.
 
IS THE WIND BLOWING?
Explain to your children that wind is moving air. Ask: "Since we can't see air, how can we tell that the wind is blowing?" Some clues: clouds moving across the sky, tree branches swaying, wind chimes ringing, paper blowing down the street. As the children give answers to the question, write their responses on paper for them to illustrate later. 


I Can Eat A Rainbow - Annabel Karmel 
                                                                          

 From Egg to Chicken - Gerald Legg


The Cloud Book - Tomie de Paola


 Little Cloud - Eric Carle
                                                                                                                               
The Wind Blew - Pat Hutchins
                                                                           

 Ten Little Ladybugs - Melanie Gerth


The Grouchy Ladybug - Eric Carl
                                                                                     

So Many Bunnies - Rick Walton


Quiet Bunny - Lisa McCue


Bunny Cakes - Rosemary Wells


South Carolina Gardening and Agricultural Resources

South Carolina has a variety of state and local resources designed to help provide educational assistance for children in learning more about our states agricultural resources. They also help students learn how to better appreciate the importance of gardening and how it impacts life for humans and animals in our own backyards.

(Clemson Extension 4H Club Program)


(County Clemson Extension Locations)


(South Carolina State University 4H Program)


(SC Farm Bureau- Ag in the Classroom)


(Ag in the Classroom Kids Page)


(Carolina Children's Garden)


Seasonal Songs


Enjoy the Spring Season!


Sunday, March 13, 2011

Websites and Ideas for Recycling Activities- We're On The Eco Move!

"We're On The Eco Move" Training
March/April 2011


The information listed on this post are projects, websites and information shared during our most recent trainings.


Cricket Caps
As shown in training class.
With this last picture, I glued elastic strips to the top so children could put one or two fingers under them
and use as symbols.
This could be used as two different sound instruments.


Paper Organizer
http://familyfun.go.com/crafts/paper-organizer-674392/


      Little Drummer

         Creating a drum for your classroom can be so easy to make.
The drum set above was created by using a small coffee can and a plastic
kitchen spoon. The top is very durable for those "excited drummers"!
For the Drum, decorating the outside was done by using green tape as the stripes
and putting smiley face stickers around the can. I created a handle by super gluing rope to the side.
The spoon was decorated by taping the handle with the same green tape as on the drum
to help make the connection between the two items.
Using the larger coffee cans gives off a more echoed sound. You can use either the plastic or metal cans! 


Lawn Bowling Set
http://www.rethinkrecycling.com/kids/fun-and-games/monthly-recycling-activites/make-your-own-lawn-bowling-set

Alternate for Bowling Activity
As shown in training class.
Use any old and clean soda bottles of any size. 
Decorate the outside with wallpaper, stickers, or colored tape.
You can fill the inside to help balance it on the floor with water (I added food coloring as well, rocks, sand, bells).
I super glued the top shut. You can make 3, 5, or even 8 pins.
Use a soft ball when letting children play the game.
 This is a great outdoor or indoor activity! 


Sorting by Size/Sensory Activity
As shown in training class.
Used: cut up pieces of paper towel roll.
Each piece is cut at alternate ascending heights.
Decorated with assortment of used materials: pipe cleaner, fabric, wallpaper, bandaids & rubberbands.
All items were either taped, glued or stapled in the inside and secured with glue.


Paper and Pencil/Marker Container
As shown in training class.
This is an inexpensive way of creating containers when the plastic ones are just out of the budget.
I used an old Ice Cream Box container, but you can use any thick cardboard box-the large Goldfish boxes are also great!
I simply cut open the top, secured the inside bottom of the box with an extra piece of cardboard, and decorated it with old wallpaper scraps.
 I secured the corners on the inside and out with extra thick tape to help it last.


Just Mine Art Display
As shown in training class.
I made this out of a toilet paper roll by wrapping it in any kind of paper (newspaper, magazine, tissue paper) and secured it inside of the roll.
On the outside, you can either cut a design from wallpaper, cereal boxes or any child favorite picture to place in the front. I taped it to the front of the display.
On the top to secure the artwork in place, I cut small 1- 1/2 inch slits on opposite but equal sides of the roll.
 I wrapped the top and bottom of the display in tape to give it a sturdier finish.
Then simply slide the paper inside the slits and your done!

Alternates: 1. You can display the front by putting the name on a card and taping to the front.
                 2. You can also display the front by different themes so children can choose which theme they would
                      like to have their picture displayed on for that week!


Counting Catepillar
As shown in Training


Alphabet Connections
As shown in training.
Thanks to Mellon Patch Child Care for sharing picture.
Using any container (coffee, cookie, oatmeal, etc), decorate the outside with an upper case letter. You can use construction paper or any thick paper of your choice while securing with contact paper.
Place inside the container, the same letter that's on the outside (either laminating or using contact paper to keep it sturdy) and a toy or item that represents the sound of that letter.
Keep the lids of the container so the items will stay in place when not being used.


Shop Til You Drop Book!
As seen in training.
I created this book for children to use in the Housekeeping/Dramatic play area, but you can create one for each interest area.

You can use an old binder notebook along with used file folders, but you can create these out of old file folders, photo albums or even using cardboard box sides for the front and back covers.

Print out front and back covers for the book and index each section on the covers with different topics such as: kitchen, bathroom, outdoors, food, dog food, toys, laundry items, cleaning supplies and restaurants.
Place paper and writing instruments within the front cover so children can make a list of the items they need from the sale book.

Each section is separated on the inside with the file folder showing the indexed item.
Cut out items representing each section and tape them on the file folder. I like the folder idea as you can add to each section whereas a photo album only has a certain number of pages available.

An extension to this activity would be to have a small storage"shopping center" area that holds actual empty boxes of the items noted in the sale book. Have the children make their list of needed items and bring it to the "shopping center" where you can trade their list for the items they would like to receive. Children would then take these items to the housekeeping area to play with or any other center where you have the books available.


 Adding one to each of your interest areas is so easy. Just think of products, places and businesses that relate specifically to the theme in that area and this will give you guidence on items to add!


"Shake That Bell" Instrument
As shown in training.
Using a peanut can, you can place small bells inside the can and seal the lid with glue.
You can also place sand in the container along with the bells if you would like to lessen the sound or create a more muffled effect. Decorate the outside anyway you would like!
You can also use beans, beads, or coins!


Paper Keeper System!
Move over Trapper Keeper!
As seen in training.
This is a perfect way of keeping those important papers that need to go home from being crumbled in the bottom of the book bag.
I took a paper towel roll, sealed the ends with masking tape and decorated the outside with old fabric and ribbon. I glued all of the fabric and ribbon pieces all over the roll.
Just roll up the paper, slide it into the tube and you are ready to go.
The kids will love to keep their work in good shape and show off not only their masterpiece but also those important information inside.
You may also choose to let children decorate theirs with paint, markers, glitter, etc. I would recommend taping the entire roll first to help it stay sturdy.


Sorting Containers for Everything
As seen in training.
It seems like their are containers of all shapes and sizes we tend to use. They can range from
applesauce cups to dog/cat food.
The cups above happen to be dog food containers and applesauce cups. After a good washing they have been turned into sorting storage for buttons.
This activity gives children opportunities to sort by shape, color, texture, size or number and in an individual or small group setting.
The experiences are endless!


Money Money Money Count!
As seen in training.
The containers above used to hold candle wax cubes.
They have lids that can close to keep whatever items you choose to use safe from falling out.

This are another great way to allow each child to use as individual paint cups, sorting and/or mathematics activities.
The pictures above are shown as being used as math counters.You can use coins, beads, buttons or anything where counting, adding and subtraction can be used. I made these for number recognition, one to one correspondence, addition and subtraction.


Pull Shaker Toy
Thanks to Mellon Patch Child Care for this great idea!
Taking a cleaned out plastic soda bottle, drill a hole on both ends of the bottle and run a piece of yarn or string through one end of the bottle and come out through the other end. Knot the two ends together. The string should be long enough for a child to be able and pull along behind them. I would measure the string from a child's hip to floor before putting in the bottle.
 Fill the inside with an assortment of items-bells, button, crinkled pipe cleaners, sand, or colored cotton balls. Decorate the outside with stickers and colored tape.
Seal the cap with super glue to ensure the bottle will not open.
Then let it roll!


Garden Caddy
Thanks to Mellon Patch Child Care for this great idea!
This is a quick and easy way for all of your children to have their own garden tool box when heading outside to work on their classroom gardens.
Taking a cleaned out milk jug, cut it in half and drill a hole (or hole punch) along the top of each side. Using string or yarn, thread through the holes to create a should handle for the caddy. Decorate the outside of the caddy to represent your classrooms garden theme. The items used inside this caddy included: pencils, paper (which were extra sheets stapled together to form a notepad), garden gloves, sprinkler head, hand shovel, and measuring cup (which is an old, plastic soda bottle cut in half, taped along the top to create a smooth edge and marked with measurement lines along the side to track how much water is used). The measuring cup is also used as the pencil holder. 


Additional Links for Extra Recycling Ideas!


RECYCLE REUSE REDUCE!